Wednesday, 24 May 2023

Oven Cleaning Hacks That Actually Work (It’s SO Easy!)

Oven Cleaning Hacks Cleanzen Infographic


Cleaning the oven is pretty much nobody’s favorite task on their cleaning list. The bad news, however, is that the more it gets put off, the more difficult and time-consuming it will be to clean. No one enjoys heating up their oven only to have it start smoking from the grease build-up. Unfortunately, we’ve all been guilty of this at some point.


Rather than spending an entire day scrubbing, you can actually try several oven-cleaning hacks to make life much so much easier when it comes to cleaning your oven. Some grease and grime may be too difficult or too far gone for hacks, but that doesn’t mean you can’t still take advantage of a few good oven-cleaning tips and tricks.


Ready to give some of these hacks a try? Then keep reading to find out exactly how to put them to the test.


How Did Your Oven Get So Dirty?


Oven Stove GIF by PWR BTTM


Each time you use your oven or stovetop to cook, food drops from your pots, pans, and plates and gathers in the nooks and crannies of the base, in the filters, and pretty much anywhere inside. Eventually, this greasy buildup can start to affect your oven’s overall performance and can even start to impact the quality and flavor of the food you are cooking inside of it.


However, having a dirty oven doesn’t become dangerous for some time, which is probably why it goes so long without cleaning in the first place. There’s no judgment here, we’ve all been guilty of avoiding this particular task.


But there is no time like the present to clean your dirty oven. So how do you do a good job, while keeping things as simple as possible to make the process quick and easy? We have a few solutions, keep reading to find out more.


Gather Supplies


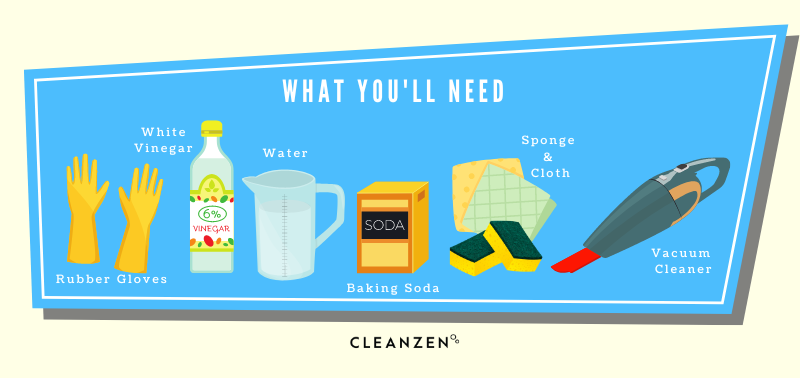
Before you get started, you’ll want to make sure you have everything you’ll need to get the job done. Here is a short list of everything we suggest having on hand:


Oven Cleaning Hacks Cleanzen Infographic Cleaning Tools and Products


Best Oven Cleaning Hacks


The First Step:


You’ll first need to get up all the crumbs and loose bits that are hiding in and around the oven. It might actually be more tricky to clear them out once you start cleaning, so it makes more sense to get them out with your vacuum first. Be careful not to let your vacuum cleaner get all greasy, there is no need to scrub the oven with it. Just suck up all the loose debris and leave the rest to clean later.


Oven Cleaning Hacks: Baking Soda Vinegar


You’ll first need to get up all the crumbs and loose bits that are hiding in and around the oven. It might actually be more tricky to clear them out once you start cleaning, so it makes more sense to get them out with your vacuum first. Be careful not to let your vacuum cleaner get all greasy, there is no need to scrub the oven with it. Just suck up all the loose debris and leave the rest to clean later.

  • Take out the oven racks so you can work deeper in the oven and also clean and degrease them. Be sure to set them on old towels, newspapers, or other surfaces so you don’t spread grime around your home.
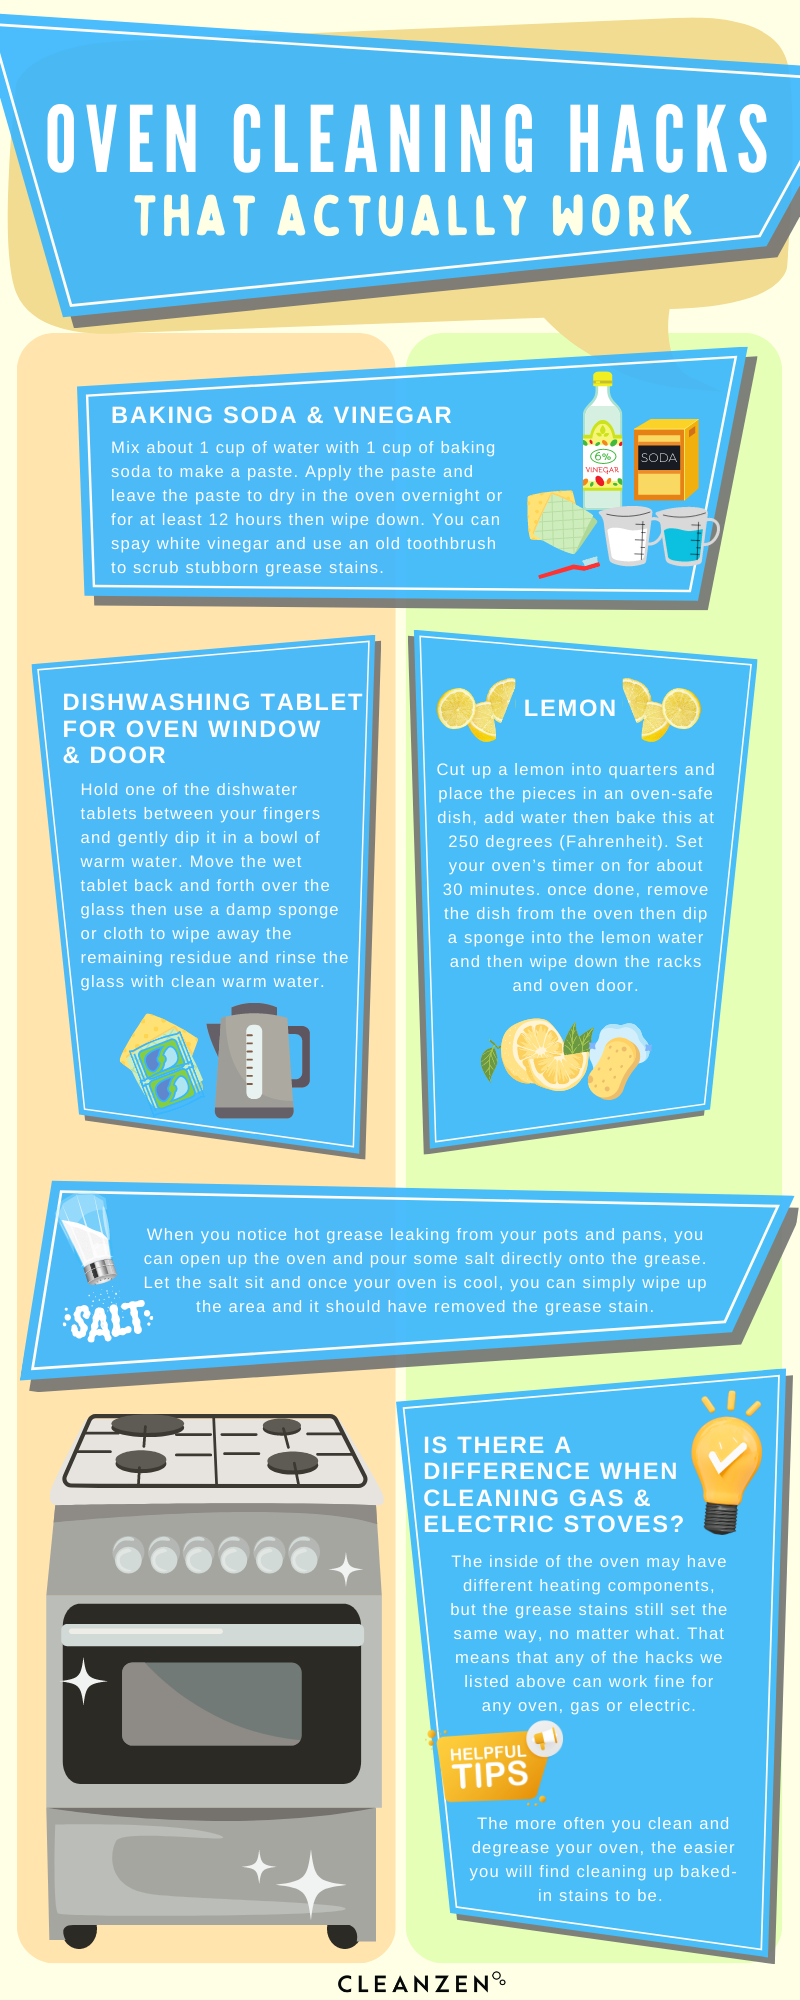
  • Mix about 1 cup of water with 1 cup of baking soda to make a paste with the consistency of craft glue. Since this is a 1:1 ratio, you’ll need to make enough of the paste to cover the entire inside of your oven.
  • Put your rubber gloves on and apply the paste to the inside of the oven with your hands, except for any of the heating components. For particularly grimey areas, you can leave a little extra paste.
  • Leave the paste to dry in the oven overnight or for at least 12 hours. During that time, you can clean and degrease the oven racks. Let them soak in a tub of hot water for a few hours, using mild dish soap to scrub away any remaining grime.
  • Wipe down the inside of your oven with a damp sponge or cloth. You can use an old toothbrush to scrub any particularly stubborn areas and grease stains.
  • For more of an intensive cleaning punch, spray some white vinegar around the oven to help treat and eliminate any remaining stubborn patches of grease.

Understandably, not everyone has 12 hours to clean their oven. If you’re on more of a time crunch, we have a few other hacks you can try your hand at.


Dishwashing Tablet


Having y messes smeared around inside the window or door of your oven isn’t a great look. But we have an easy fix for this with this hack:

  • Grab your trusty pair of rubber gloves and a few dishwasher tablets.
  • Hold one of the dishwater tablets between your fingers and gently dip it in a bowl of warm water. Move the wet tablet back and forth over the glass and pay extra care to the more stubborn grease stains.
  • The tablet will dissolve, so you may need a second one depending on how quickly this happens.
  • Use a damp sponge or cloth to wipe away the remaining residue and rinse the glass with clean warm water.

You may have heard that dishwasher tables are a good oven door cleaning hack. Now you know that it’s true!


Lemon Oven Cleaning Hacks


Oven Cleaning Hacks Woman Cutting Lemons in Half


This trick has actually been around for some time but it has recently been blowing up on TikTok. For good reason too, as this is one of the easiest hacks to clean your oven. Here is how it works:

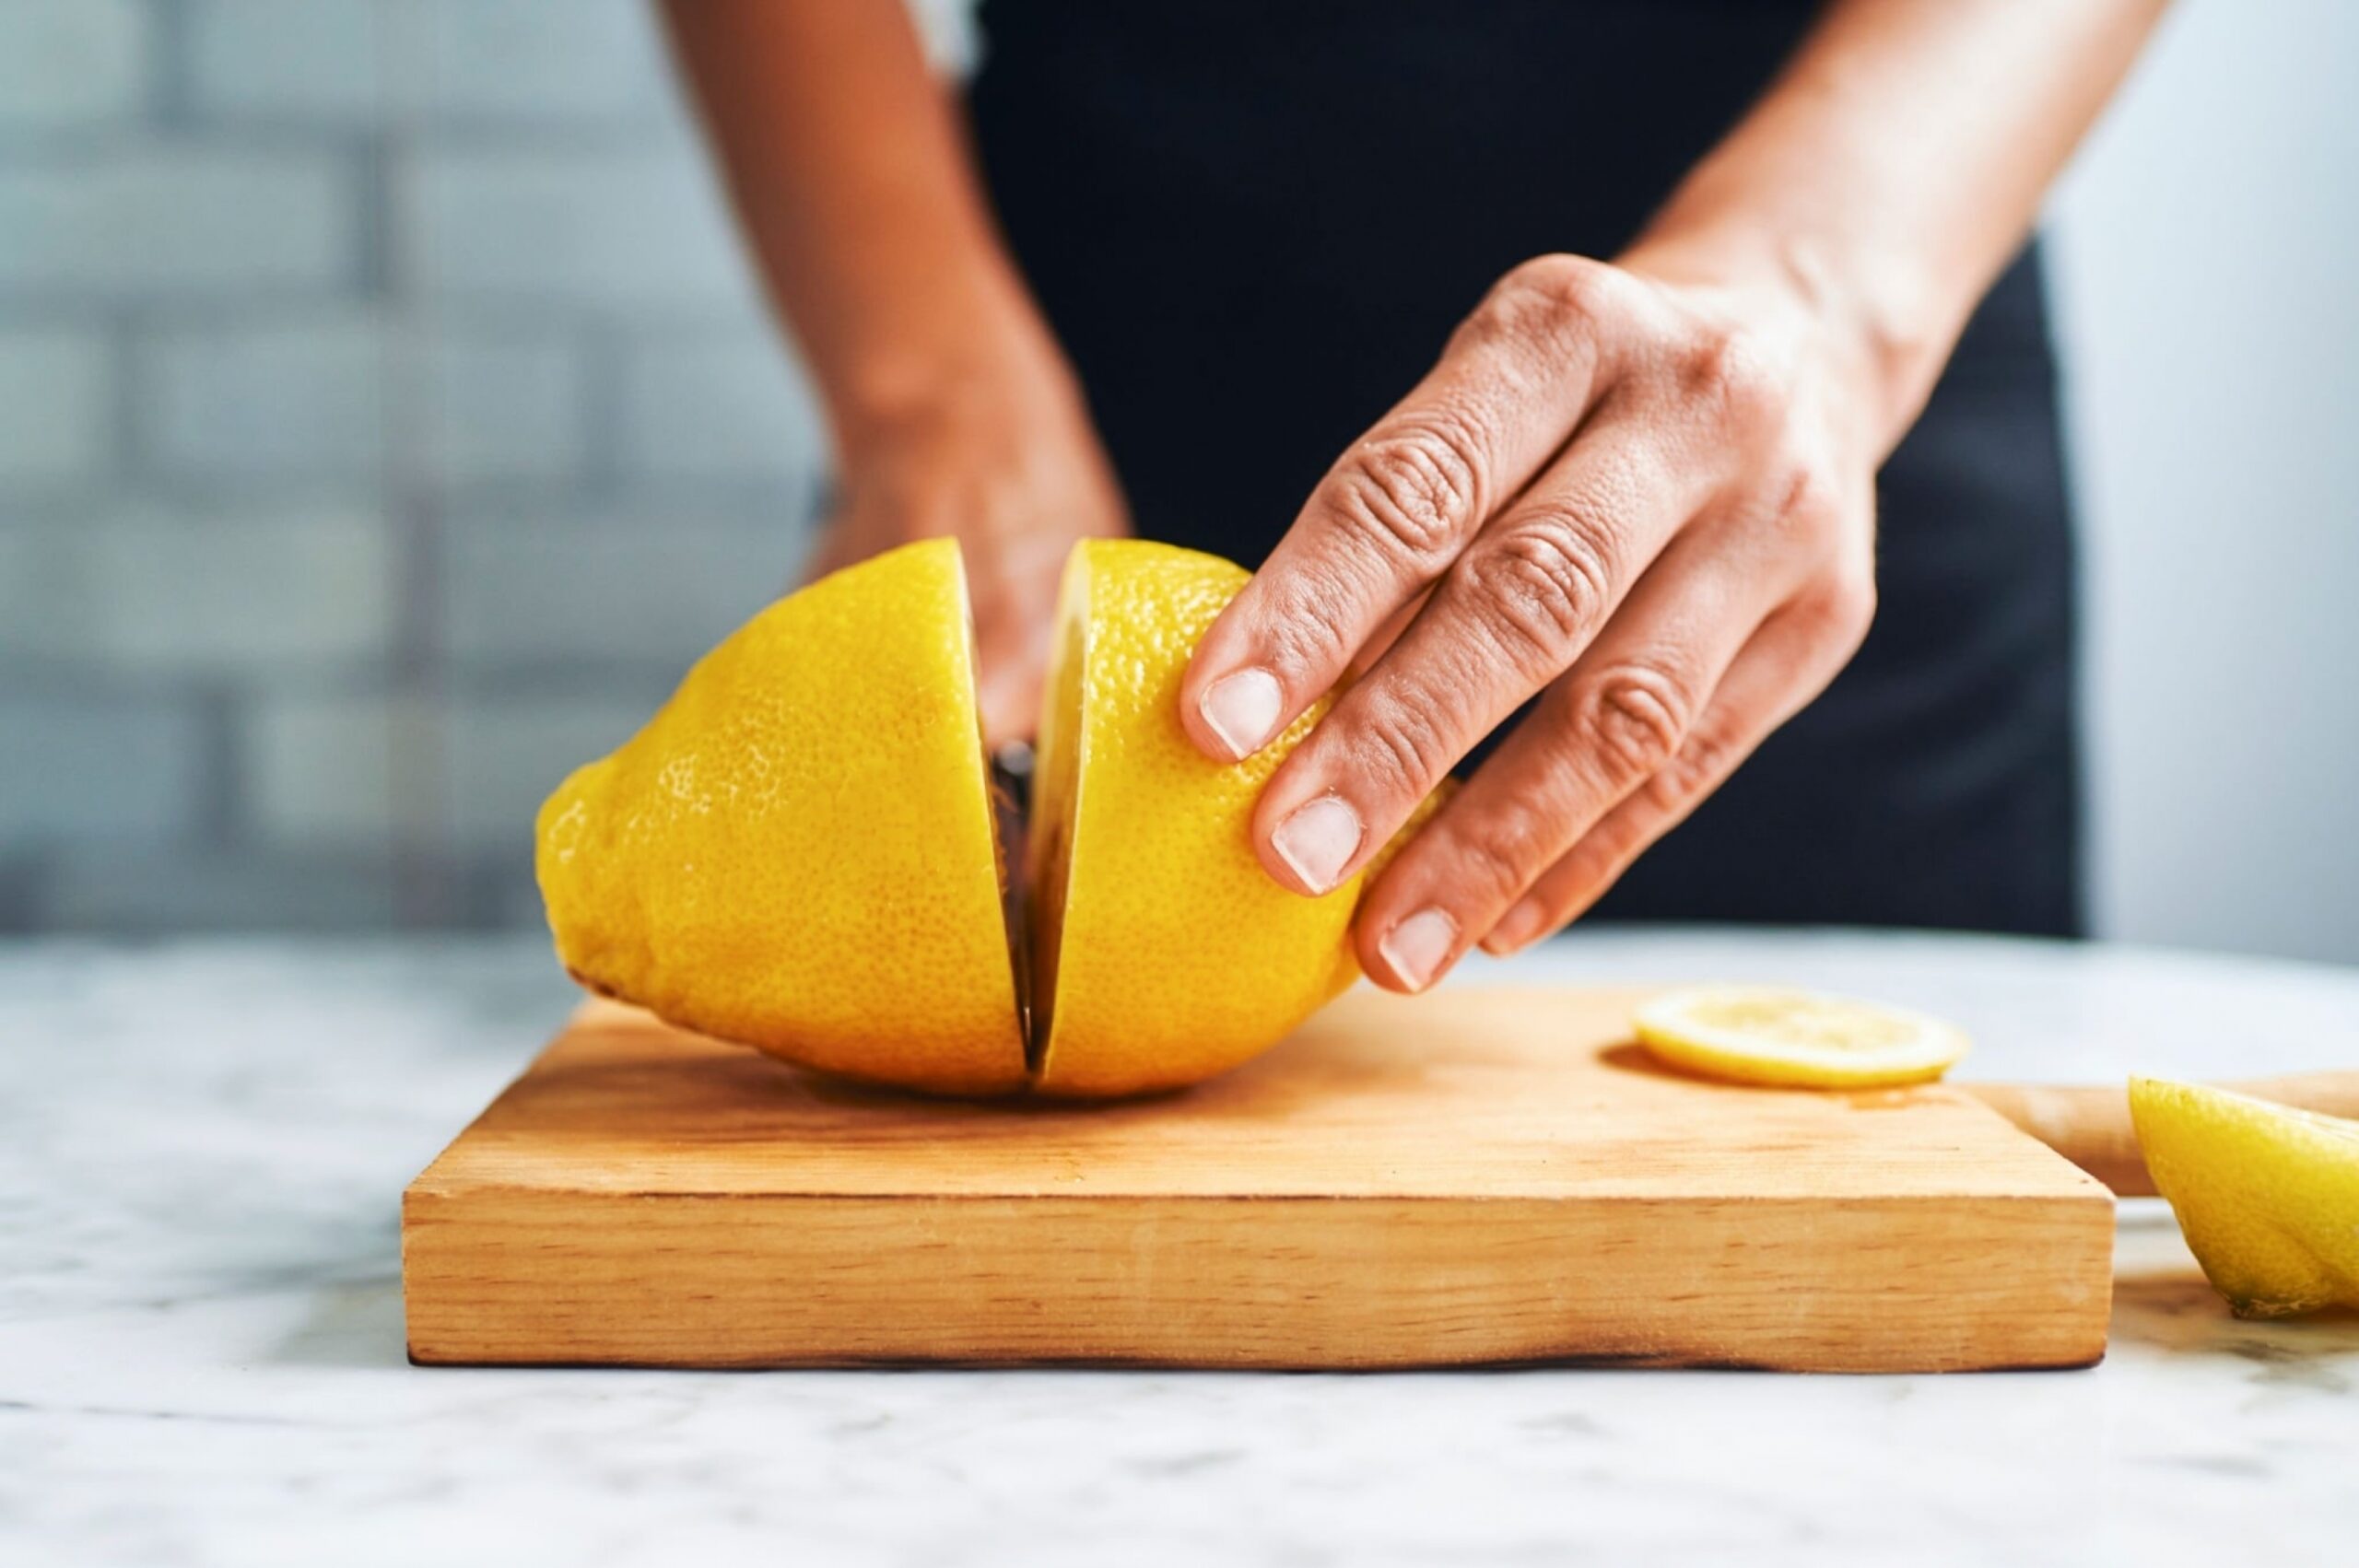
  • Cut up a lemon into quarters and place the pieces in an oven-safe dish.
  • Pour some water over the lemons into the dish and then place the dish with water and lemons in the oven.
  • Bake this at 250 degrees (Fahrenheit) and set your oven’s timer on for about 30 minutes.
  • After the timer goes off, remove the dish from the oven. Dip a sponge into the lemon water (very carefully, it’ll still be hot!) and then wipe down the racks and oven door.

Remember that the oven will be hot during this process, so make sure you are careful and protected while you clean in and around the oven.


Salt


If you catch grease spills early, they can be treated and cleaned up almost immediately to minimize the amount of damage to your oven. When you notice hot grease leaking from your pots and pans, you can open up the oven and pour some salt directly onto the grease. Let the salt sit for about 2-3 hours while your oven cools off after you’re done cooking. Once your oven is cool, you can simply wipe up the area and it should have removed all, if not almost all, of the grease stain.


Is There a Difference When Cleaning Gas and Electric Stoves?


Finally, let’s talk about the type of stove you have in your home. Some people wonder whether they can or should treat grease spills differently in a gas oven than in an electric oven. And that is a fair question, so here is the answer: The inside of the oven may have different heating components, but the grease stains still set the same way, no matter what. That means that any of the hacks we listed above can work fine for any oven, gas or electric.


Don’t Wait To Clean!


The more often you clean and degrease your oven, the easier you will find cleaning up baked-in stains to be. At the end of the day, the process is pretty much the same no matter when you last cleaned it. The process we suggest for intensive cleaning is the overnight method using baking soda. This allows time to soak and loosen up bigger greasy messes.


In a pinch, using salt can be a big time-saver when fighting against larger messes down the road. Of course, when you need to clean up and remove that lingering smell of burnt food, try the lemon hack to leave your home smelling fresh and clean for days.


For more cleaning tips, tricks, and hacks check out our blog and read up on a variety of topics from cleaning to staying organized. You can also book any variety of our available cleaning services for your home with our friendly and affordable cleaning team.

The post Oven Cleaning Hacks That Actually Work (It’s SO Easy!) appeared first on Cleanzen.

from Cleanzen https://cleanzen.com/blog/oven-cleaning-hacks/
via IFTTT

From https://cleanzencleaningservices00.blogspot.com/2023/05/oven-cleaning-hacks-that-actually-work.html

from
https://cleanzencleaningservices00.wordpress.com/2023/05/24/oven-cleaning-hacks-that-actually-work-its-so-easy/

from Kirstie Bravo https://kirstiebravo.blogspot.com/2023/05/oven-cleaning-hacks-that-actually-work.html
via IFTTT

from Kirstie Bravo https://kirstiebravo.wordpress.com/2023/05/24/oven-cleaning-hacks-that-actually-work-its-so-easy/
via IFTTT

from David Benedict https://davidbenedict0.blogspot.com/2023/05/oven-cleaning-hacks-that-actually-work.html
via IFTTT


from
https://davidbenedict0.wordpress.com/2023/05/25/oven-cleaning-hacks-that-actually-work-its-so-easy/

Wednesday, 17 May 2023

How to Get Oil Out of Clothes (Without Ruining Them!)

How to Get Oil Out of Clothes Cleanzen Infographic


A nice big bite of a juicy hamburger or hovering over a cooking pan without an apron can catch anyone by oily surprise, it happens to us all even at the worst times. Accidents happen no matter how hard you try to avoid them, but that doesn’t mean you have to say goodbye to your favorite shirt.


Follow our quick and easy method below to learn the best tips for removing stubborn oil and grease stains from your clothing.


Why Are Oil Stains So Difficult to Remove?


Grease and oil leave behind some of the most annoyingly stubborn stains on clothing. These stains can be hard to clean, but luckily it is not impossible. How successful the removal is really depends on the state of the stain, the material, the color of the fabric, and the method you use to clean it.


Even if a stain is small and light when you first catch it, it can darken on the fabric over time as it sets in, which is why it’s essential to remove them as soon as possible. The longer you wait to treat and remove the stain, the more absorbed the oil and grease will become into your clothing.


Once it dries, the stain will be pretty difficult to remove and might even ruin your clothes. So how do you save your clothing before those annoying stains have time to set in? Keep reading to find out what tips and tricks we have for you.


What You’ll Need to Get Oil Out of Clothes


When you are checking around your home to find the right things to use against an oil or grease stain, you’ll want to make sure you use the right products and tools. Here is a general list of products you can use to treat oil stains, according to the method we provided below:


How to Get Oil Out of Clothes Cleaning Tools and Products


How to Get Oil Stains Out of Clothes


Got your supplies and feeling ready to tackle those pesky oils stains? Here is our go-to method for removing oil stains from your clothes, along with a few extra steps for more stubborn and set-in stains:


Blot the Stain

Use a paper towel, napkin, or microfiber cloth to blot away as much of the oil as possible as soon as you notice the stain. This will make it easier to clean and treat the stain once you start washing it. Avoid rubbing at the stain, as this will only push the grease and oil deeper into the fabric’s fibers and make it even harder to fully remove it.


Apply Soap

Lay the piece of clothing on a flat surface and put a few drops of dish soap directly onto the stain. Work the soap into the fabric with your hands or with a toothbrush to bring the soap to a lather to loosen the oil and grease.


Apply Baking Soda (for stubborn stains)

If you’re dealing with more stubborn and set-in stains, sprinkle a bit of baking soda directly onto the stain with the dish soap. Scrub the powder and soap with a toothbrush and then let it sit for a few minutes until the baking soda dries slightly and covers the stain in a hard paste.


Rinse with Hot Water

After you’ve allowed the dish soap, and baking soda if needed, to work on fighting the stain for about an hour, rinse the clothing with hot water. Once you are done, dip the affected area on the fabric in hot water and leave it for another hour.


Wash & Air Dry

Once the stain is all but gone from the clothing, wash the garment in your washing machine on a warm water cycle and then let it air dry rather than in your dryer. If the stain has not been completely lifted and removed, you may want to repeat the previous steps once again.


Soak with Bleach & Water (for stubborn stains)

Sometimes, stubborn stains can require more drastic measures. If the fabric has been washed and dried but still has staining left behind, dip it in some warm water mixed with a color-safe bleach and let allow this to sit for about an hour. Once it has been left to soak, wash and dry the garment as normal.


Tips, Tricks, & FAQs


How to Get Motor Oil Out of Clothes?

How to Get Oil Out of Clothes Cleanzen Image Motor Oil
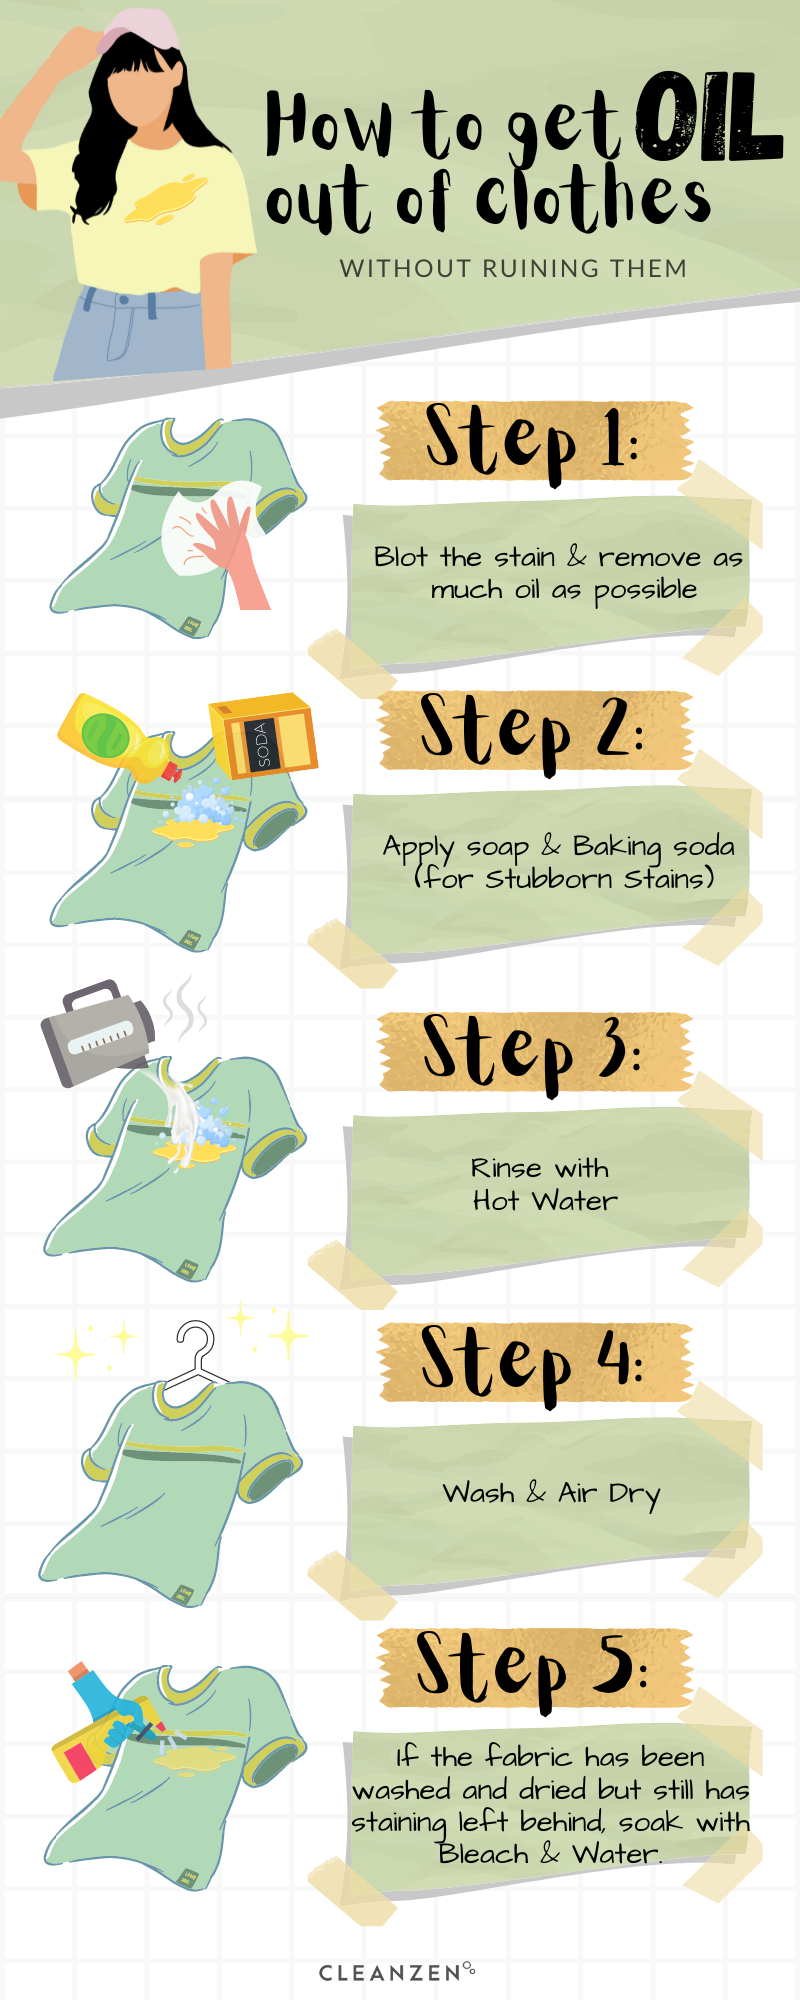
Treating and removing motor oil stains has pretty much the same process as regular oil. Blot away as much of the stain as possible, apply dish soap and baking soda and scrub the mixture with a toothbrush, rinse and soak in hot water, and then run through the washing machine.


Are Oil Stains Permanent?


The short answer is, they can be. However, if you catch and treat oil stains quickly, you have a better chance to remove them. The best course of action is to blot fresh stains quickly and treat them even quicker. The longer you wait to treat oil or grease stains, the more likely they are to be permanent.


Unfortunately, success isn’t always guaranteed and you can sometimes be left with a permanent stain. The fibers and fabric of your clothing may contribute to how stubborn oil and grease stains can be. Synthetic fibers like polyester are incredibly difficult to clean because oil and excess grease particles stick to them like magnets, meaning that without proper care and attention, stains could become permanent and ruin your clothes for good.


How Do You Get Oil Stains Out of Jeans?


You can approach oil stains on your jeans and other denim as you would on any other piece of clothing, and since denim is generally made from natural fibers, it is usually more accepting of stain removal than synthetic fibers. Start by blotting the stain so it doesn’t settle into the fibersHow to Get Oil Out of Clothes Cleanzen Image Oil Stains on JeansIf you’re out and can’t remove your jeans, use a bit of salt or artificial sweeteners on the stain to soak up as much of the offending oil until you can give your jeans a deep clean at home using the method we provided above.


How to Get Old Oil Stains Out of Clothes


Dried oil stains are much more difficult to get out of clothing, but luckily it is not a completely impossible task. The first thing you’ll have to do to remove the stain is attempt to return the oil stain to a liquid state by using hot water. If that doesn’t work, add a little more oil to help revive and loosen it up.


Many people actually swear by treating oil and grease stains with WD-40. You can do this by spraying a small amount into a bowl and applying it with cotton swabs. Place a towel or microfiber cloth on the other side of the fabric so that the oil stain doesn’t soak through to the back of the clothing item. Once the stain has been treated with the WD-40, soak up the remaining stain using the same method we provided above, and then wash and dry the garment as usual.


Is Hot or Cold Water Better for Removing Stains?
How to Get Oil Out of Clothes Cleanzen Image Hot or Cold Setting

Oil and grease are usually semi-solid at room temperature, meaning that it needs to be fully liquid to be properly removed. The best way to liquify grease spots and stains on fabric is to use warm or hot water when treating and washing the garment.


Is White Vinegar a Degreaser?


Distilled white vinegar is our favorite degreaser! To use it o help treat oil and grease stains, mix it with some water. We recommend about 1 part vinegar to about 4 parts water. Apply this solution directly to the grease and let it sit for a few minutes to an hour.


That pungent vinegar smell will dissipate once the item is completely dry, and especially after you run it through the wash. Remember to test in an inconspicuous area before applying the solution to stains because even diluted vinegar can discolor certain fabrics.


What Mistakes Should You Avoid When Removing Oil Stains?


  • Always blot, never rub, a stain, including oil stains.
  • Always try and address an oil stain immediately so it doesn’t have time to settle into the fabric and dry.
  • Since oil stains are, avoid using any water on an oil stain. If the stain has dried, then you should only use hot water.


Remember, speed is key when treating and removing oil from clothes. Work as fast as you can and you should be able to remove any oliy stains from your clothes easily. For more cleaning tips and tricks, and to book services for your home or business, check out Cleanzen Cleaning Services today!

The post How to Get Oil Out of Clothes (Without Ruining Them!) appeared first on Cleanzen.

from Cleanzen https://cleanzen.com/blog/how-to-get-oil-out-of-clothes/
via IFTTT

From https://cleanzencleaningservices00.blogspot.com/2023/05/how-to-get-oil-out-of-clothes-without.html

from
https://cleanzencleaningservices00.wordpress.com/2023/05/17/how-to-get-oil-out-of-clothes-without-ruining-them/

from Kirstie Bravo https://kirstiebravo.blogspot.com/2023/05/how-to-get-oil-out-of-clothes-without.html
via IFTTT

from Kirstie Bravo https://kirstiebravo.wordpress.com/2023/05/17/how-to-get-oil-out-of-clothes-without-ruining-them/
via IFTTT

from David Benedict https://davidbenedict0.blogspot.com/2023/05/how-to-get-oil-out-of-clothes-without.html
via IFTTT


from
https://davidbenedict0.wordpress.com/2023/05/18/how-to-get-oil-out-of-clothes-without-ruining-them/

Thursday, 11 May 2023

How to Get Dog Poop Out of Carpet (Guide & Tips)

How to Clean Dog Poop Out of Carpet Cleanzen Infographic


Even our most beloved and well-behaved furry friends can have accidents inside our houses, it happens to the best of us. Fortunately, we have the fix for even the most smelly of “gifts” like a helpful DIY recipe and a super simple guide to effectively clean up dog poop. Keep reading to find out how to rid your home of your pup’s “present” without a trace.


You’re Not the Only One


If you think you’re the only one to deal with little “gifts” from your furry friends, we can promise that you’re not. In fact, most homes that have dogs have dealt with the same problem. Wondering just how many households have dogs? Well, American Veterinary Medical Association estimates that about 48.2 million households own a dog.


Imagine how many of those homes have also dealt with having to clean up their dog’s poop. No matter how long you’ve had your furry friend and how well-trained they are, accidents can and will happen, and that’s okay! You just have to know how to take care of them properly.


Cleaning Dog Poop Smell From Carpet


Everyone’s favorite and most trusted cleaning product is back again to make cleaning your pet’s little “present” from your carpet. That’s right, baking soda is once again here to save the day. Baking soda is our favorite and most recommended odor-fighting product that works to absorb and remove unpleasant smells from around your home instead of just disguising them.


It is also a natural, non-toxic, and eco-friendly alternative to other products on the market, making this a safe and effective product to use around kids and furry friends.


What You Need


Before you get started with the cleaning process, it is important to make sure you have all the tools and products you’ll need on hand. Curious about what that includes? Here is a list of the basics to help you get started:

  • Rubber gloves
  • Cleaning cloths or paper towels
  • Baby Wipes
  • Non-Bleach Dish Soap Water
  • Distilled White Vinegar
  • Baking Soda
  • Vacuum


How to Get Dog Poop Out of Carpet


Luckily, cleaning can be pretty straightforward when you know what to do. Here is the easiest and most effective way to clean up dog poop from your carpets:


1. Act Fast


The faster you catch and clean up your furry friend’s little “gift” the better. When the poop has time to settle into the carpet it will unfortunately also have time to leave a more stubborn stain, so make sure you catch and clean the mess as soon as possible.


2. Pick Up the Mess

Break out your rubber gloves (and maybe a mask if you’re sensitive to smells!) and paper towels because the first step in cleaning up puppy poop is picking up all the potential droppings. There really is no better way of telling you you have to pick up poop is there?


3. Wipe Up the Mess

Unfortunately, sometimes our beloved pups can have some less-than-solid accidents in the house, and that’s okay. It is, however, important to wipe up as much of this mess as possible. Baby wipes are a good product to use in this situation, just remember to also have those rubber gloves handy.


4. Mix Up a Dog Poop Cleaning Solution


How to Clean Dog Poop Out of Carpet Cleanzen Diy Dog Poop Spray Infographic


Once the primary source of any staining has been removed and wiped away, you can get to work treating any stains. In order to do this, here is a great DIY recipe you can create to help the process:

  • In a bowl or spray bottle mix together: 2 cups of cold water, 1 tablespoon of non-bleach dish soap & 1 tablespoon of white vinegar
  • Mix all these ingredients very well each time you use the solution, especially when in a spray bottle.
  • Be sure to check that your dish soap isn’t bleach based or contain any bleach whatsoever. Bleach should never be mixed with cleaning acids like vinegar as this will result in highly toxic fumes.

5. Apply the DIY Poop Spray

Use the solution you just created by spraying or pouring a small amount directly onto the stained area. Allow the solution to set into the stain for about 10 minutes, and then blot the stain until it is no longer visible. This requires patience and may need several rounds, but the stain should lift with some work.


6. Rinse

Once the stain has been fully lifted and blotted away, pour some clear cold water over the area you’ve been treating. Blot this up with a microfiber cloth or paper towels to remove any remaining cleaning solution and water.


7. Treat the Smells

To remedy any lingering smells, sprinkle a generous amount of baking soda over the affected area. Allow the powder to sit for 10 minutes or even overnight (for larger messes) to fully treat and remove any lingering odors.


8. Vacuum

Once the baking soda has been left to sit and absorb any odors, you can remove it by thoroughly vacuuming the entire area. And voila! No more stains and no more smells.


What Cleaning Products Clean Dog Poop Stains From Carpet?


When you’re in need of an efficient product that can tackle stains and odors all in one, you’ll want to look for a good enzyme cleaner. Enzyme based cleaners work by releasing probiotics that are activated when you spray the product and begin working as soon as they hit the affected area.


As long as you reapply and keep the area damp with the product, those probiotics will continue to multiply and remove the offending stain and odor until they’re gone. These products are basically the Holy Grail if you are dealing with pet urine, vomit or poop so you’ll want to make sure you find the right product for your home.

How to Clean Dog Poop Out of Carpet Cleanzen Enzymatic Cleaner


When looking for an enzymatic cleaner, it is important to find one that contains protease enzymes, such as Nature’s Miracle Advanced Dog Enzymatic Stain and Odor Eliminator, since those types of enzymes break down proteins or you can also try Bissell Professional Pet Stain and Odor Removing Formula. Let us know what you think of these products in the comments below and feel free to suggest your favorite enzyme cleaner to others!


More Tips & Tricks in Cleaning Up Dog Poop From Carpet


  • If you’re using any pre-formulated cleaning products, always read the manufacturer’s instructions before using them on your carpet. A few products can be harmful to your carpet if they aren’t used correctly.
  • Always remember to blot, not rub! Rubbing at stains will drive the stain deeper into the carpet fibers, resulting in a more stubborn spot and smells that might never leave.
  • Remember to test any cleaning formulas in a small, hidden area on your carpet before cleaning to avoid any permanent damage. This applies to pre-formulated and DIY cleaning products.
  • Unfortunately, getting creative when it comes to mixing cleaning products actually isn’t the best idea, especially around pets and kids. In fact, mixing products that contain bleach with acidic products like vinegar can create highly toxic gases. Find out more about why you should never mix bleach and vinegar for cleaning here!


Related Video: Check out this video on how you can get poop off your carpet in under 2 minutes:

The post How to Get Dog Poop Out of Carpet (Guide & Tips) appeared first on Cleanzen.

from Cleanzen https://cleanzen.com/blog/how-to-clean-dog-poop-out-of-carpet/
via IFTTT

From https://cleanzencleaningservices00.blogspot.com/2023/05/how-to-get-dog-poop-out-of-carpet-guide.html

from
https://cleanzencleaningservices00.wordpress.com/2023/05/11/how-to-get-dog-poop-out-of-carpet-guide-tips/

from Kirstie Bravo https://kirstiebravo.blogspot.com/2023/05/how-to-get-dog-poop-out-of-carpet-guide.html
via IFTTT

from Kirstie Bravo https://kirstiebravo.wordpress.com/2023/05/11/how-to-get-dog-poop-out-of-carpet-guide-tips/
via IFTTT

from David Benedict https://davidbenedict0.blogspot.com/2023/05/how-to-get-dog-poop-out-of-carpet-guide.html
via IFTTT


from
https://davidbenedict0.wordpress.com/2023/05/11/how-to-get-dog-poop-out-of-carpet-guide-tips/

Wednesday, 3 May 2023

Never Mix Bleach and Vinegar: Yes, It Can Kill You

mixing bleach and vinegar infographic


Cleaning like a pro can often mean getting creative with cleaning supplies. You’ve probably become very familiar with products like bleach and vinegar when it comes to keeping things clean and disinfected. But do you know what happens when you mix bleach and vinegar together?


Turns out, mixing these two effective products isn’t as good of a cleaning cocktail as you may think. Keep reading to find out why you should never, ever mix bleach and vinegar when you clean around your home.


Can You Mix Bleach and Vinegar?


Is mixing bleach and vinegar ever a good idea? The short answer is absolutely not. Along with a bit of a science lesson: When you mix chlorine bleach, which contains sodium hypochlorite, with vinegar this will create chlorine gas.


This is a highly dangerous chemical that’s actually deadly in high volumes. So even though it might seem like you’re intensifying your cleaning power by using bleach and vinegar at the same time, it is never safe to mix the two, even in very small amounts.


What Happens if You Mix Bleach and Vinegar?


Mixing any amount of bleach with even the smallest bit of vinegar creates a harmful chemical reaction best known as chlorine gas. What’s worse is that this toxic, and sometimes lethal, gas is completely invisible, so the only way to detect it is by smell.


The horrible and fast-acting side effects you will likely experience after being exposed to it are a clear sign of exposure as well. No matter how you may have been exposed to chlorine gas, you will know almost immediately due to the smell and symptoms. To find out what potential symptoms you may experience from chlorine gas, check out the list below.


Symptoms of Exposure


If you accidentally created and exposed yourself to chlorine gas without realizing it, you will most likely be exhibiting some very obvious symptoms. According to the CDC, the following are the most common symptoms of exposure to chlorine gas:


mixing bleach and vinegar symptoms of chlorine exposure infographic


What to do After Mixing Bleach & Vinegar


If you have in any way mixed bleach and vinegar and been exposed to chlorine gas, the best course of action at the moment is to remain calm and move to fresh air. Here are the best methods for protection against chlorine gas exposure:

  • If you accidentally created chlorine gas anywhere within your home, open as many windows around the space as possible and immediately call the American Association of Poison Control Centers, at 1-800-222-1222 for proper cleaning and disposal methods.
  • If any combination of bleach and vinegar has contaminated your clothing, remove it immediately. Avoid pulling contaminated clothing over your head or face and place the clothing in a sealable plastic bag to be discarded by local authorities.
  • If your eyes have started to burn, flush them with lukewarm water for 10 to 15 minutes, and do not use eye drops as they can worsen the situation.
  • Remove any contacts or glasses and immediately shower in lukewarm water from head to toe without scrubbing. Use mild soap to clean your skin and DO NOT allow the water to run into your eyes, mouth, or nose.


Alternatives to Use Instead of Bleach & Vinegar


Instead of mistakenly reaching for bleach to boost the cleaning power of vinegar, try any of the following methods to avoid risking your home and family to harmful chlorine gas.


mixing bleach and vinegar alternatives to bleach and vinegar infographic


For Cleaning & Disinfecting:


Use Vinegar on its Own


As we said, plain old distilled white vinegar packs far more of a punch than many people may think. It can disinfect and brighten your laundry and even help remove soap and hard water residue. Because it is 80% effective against viruses and mold bacteria, it is an amazing solution for a more natural and safe disinfectant.


Even though it is a highly effective disinfectant, vinegar is non-toxic if ingested or inhaled, making it a strong alternative to bleach.


Baking Soda


If you are on the hunt for a great cleaning and whitening agent, baking soda is our favorite solution. Baking soda is great at fighting those hard-to-get-out stains on clothing, furniture, and floors. A small amount of baking soda can greatly improve the cleaning power of vinegar, lemon juice, and water.


While baking soda isn’t the top solution for disinfecting, it still has a wide variety of uses for cleaning and stain fighting around the house.


Hydrogen Peroxide


You probably already have a bottle of hydrogen peroxide in your first aid kit to clean up a cut, but it can do much more than that around your home. Hydrogen peroxide is a great natural alternative for treating bacteria, mold and fungal growth, as well as bad odors around the house in place of bleach.


If you usually use bleach to disinfect and clean surfaces, just grab a cloth and use a 3% solution of hydrogen peroxide to kill many types of bacteria including salmonella around the kitchen.


Lemon Juice


You can use hot water and lemon juice against mold and mildew stains, as well as on kitchen counters to kill bacteria and keep your home lemony-fresh. It works well to remove grime because the citric acid within lemon juice is a bonding agent.


This means it can stick to minerals and other particles in grime and dirt and help to dissolve them as you scrub the surface. Nothing works quite as well as lemon juice to make sure your home looks and smells incredible.


Castile Soap


Castile soap is an amazing natural soap that you can use as a bleach alternative for a variety of cleaning purposes including laundry, mopping, and cleaning countertops. While it is not a disinfectant like bleach, castile soap is still great at removing dirt, grime, and many surface stains.


You can create a cleaning solution by mixing ¼ cup of castile soap with about 1 quart of warm water. Depending on how much you use and how often you use it, you can either safely pour the dirty mixture down the sink or even save it in a spray bottle for next time.


For Laundry:


Oxygen Bleach for Laundry


mixing bleach and vinegar fills detergent in the washing machine


Oxygen bleach is a gentle, non-toxic alternative to chlorine bleach for cleaning laundry, bathrooms, kitchens, etc. Although they might sound similar, the main difference between oxygen bleach and chlorine bleach is the active ingredients they contain and how they work to remove stains and whiten fabrics.


Oxygen bleach’s active ingredient is sodium percarbonate which works by releasing oxygen ions that break down stains and dirt, causing damage to fabrics or causing color loss like chlorine bleach might.


A Pinch of Salt


Regular old table salt can be another natural bleach alternative for removing stains and brightening fabrics like sheets, tablecloths, hand towels, and other white clothing. It is a natural mineral that can be used as an abrasive cleaning additive and can help break down stains and grime when mixed with small amounts of water.


You can create a thick paste of salt and water to use as a laundry pre-treatment for stains or to remove mildew in and around the bathroom. For safety, always follow all instructions when cleaning with salt around the house.


When in Doubt, Trust the Professionals


The best solution for avoiding the risk of mixing bleach and vinegar is by calling in a professional cleaning company. To make things super easy for you and your family, feel free to check out our green cleaning services! Using environmentally friendly products and equipment is important, especially around kids and pets.


Be sure to check out our blog for more cleaning tips and tricks and find out how to further avoid contaminating your home by mixing bleach and vinegar. We’re proud to offer a variety of friendly and affordable services and cleaning guides to our clients and we look forward to hearing from you!

The post Never Mix Bleach and Vinegar: Yes, It Can Kill You appeared first on Cleanzen.

from Cleanzen https://cleanzen.com/blog/mixing-bleach-and-vinegar/
via IFTTT

From https://cleanzencleaningservices00.blogspot.com/2023/05/never-mix-bleach-and-vinegar-yes-it-can.html

from
https://cleanzencleaningservices00.wordpress.com/2023/05/04/never-mix-bleach-and-vinegar-yes-it-can-kill-you/

from Kirstie Bravo https://kirstiebravo.blogspot.com/2023/05/never-mix-bleach-and-vinegar-yes-it-can.html
via IFTTT

from Kirstie Bravo https://kirstiebravo.wordpress.com/2023/05/04/never-mix-bleach-and-vinegar-yes-it-can-kill-you/
via IFTTT

from David Benedict https://davidbenedict0.blogspot.com/2023/05/never-mix-bleach-and-vinegar-yes-it-can.html
via IFTTT


from
https://davidbenedict0.wordpress.com/2023/05/04/never-mix-bleach-and-vinegar-yes-it-can-kill-you/

Oven Cleaning Hacks That Actually Work (It’s SO Easy!)

  Cleaning the oven is pretty much nobody’s favorite task on their cleaning list. The bad news, however, is that the more it gets put off,...